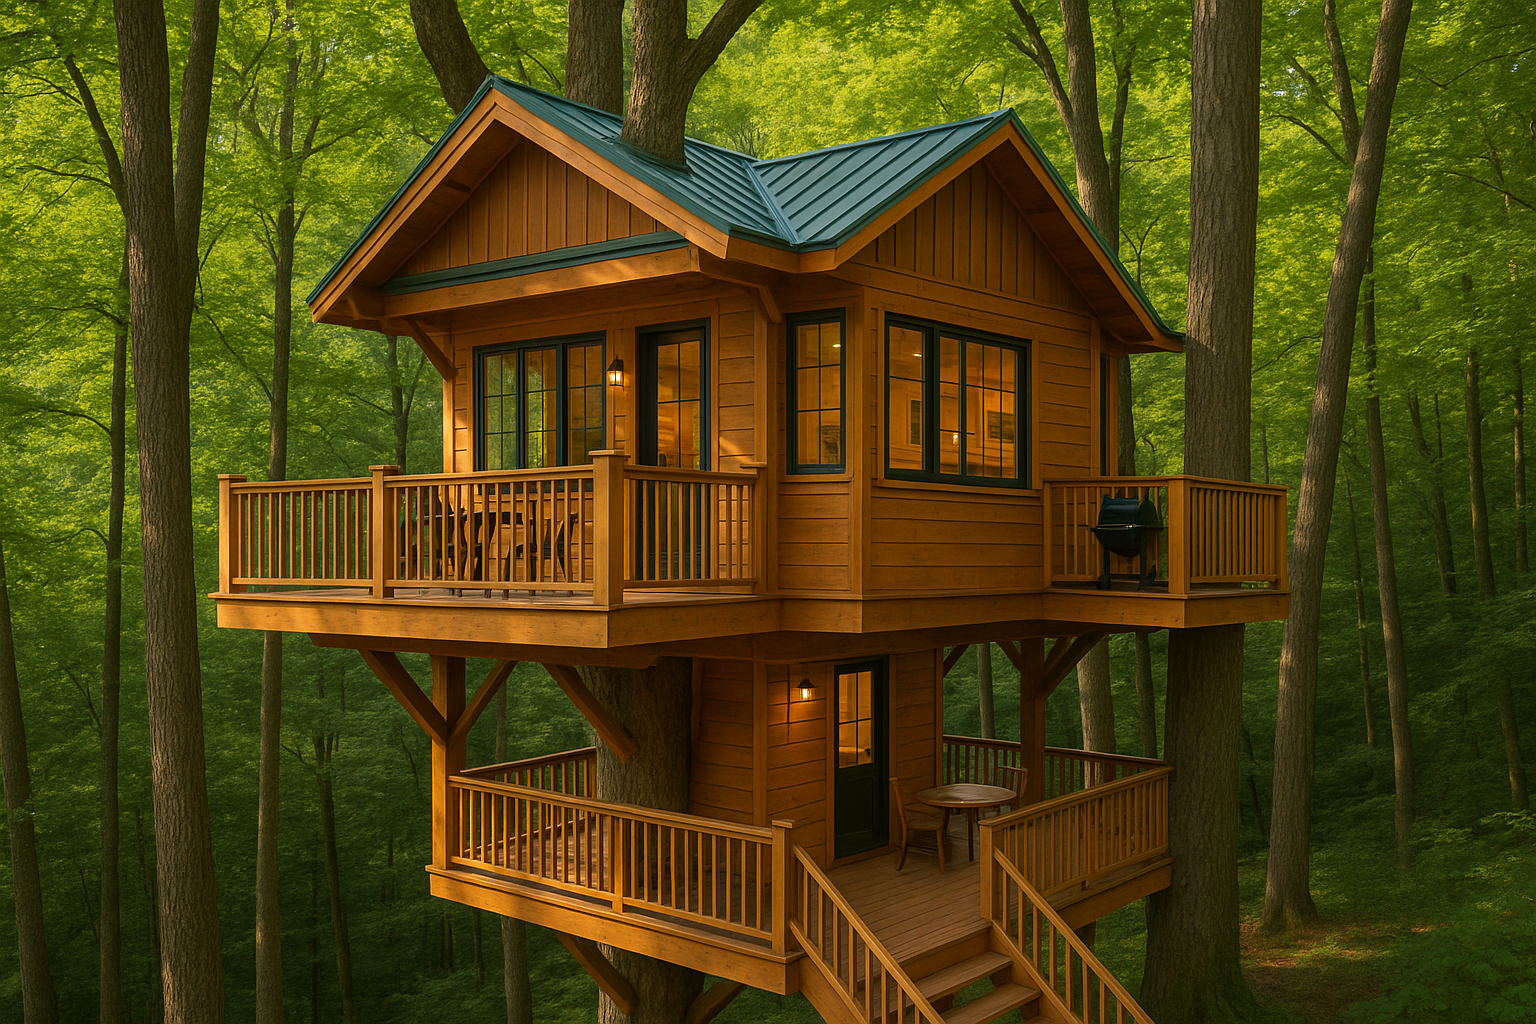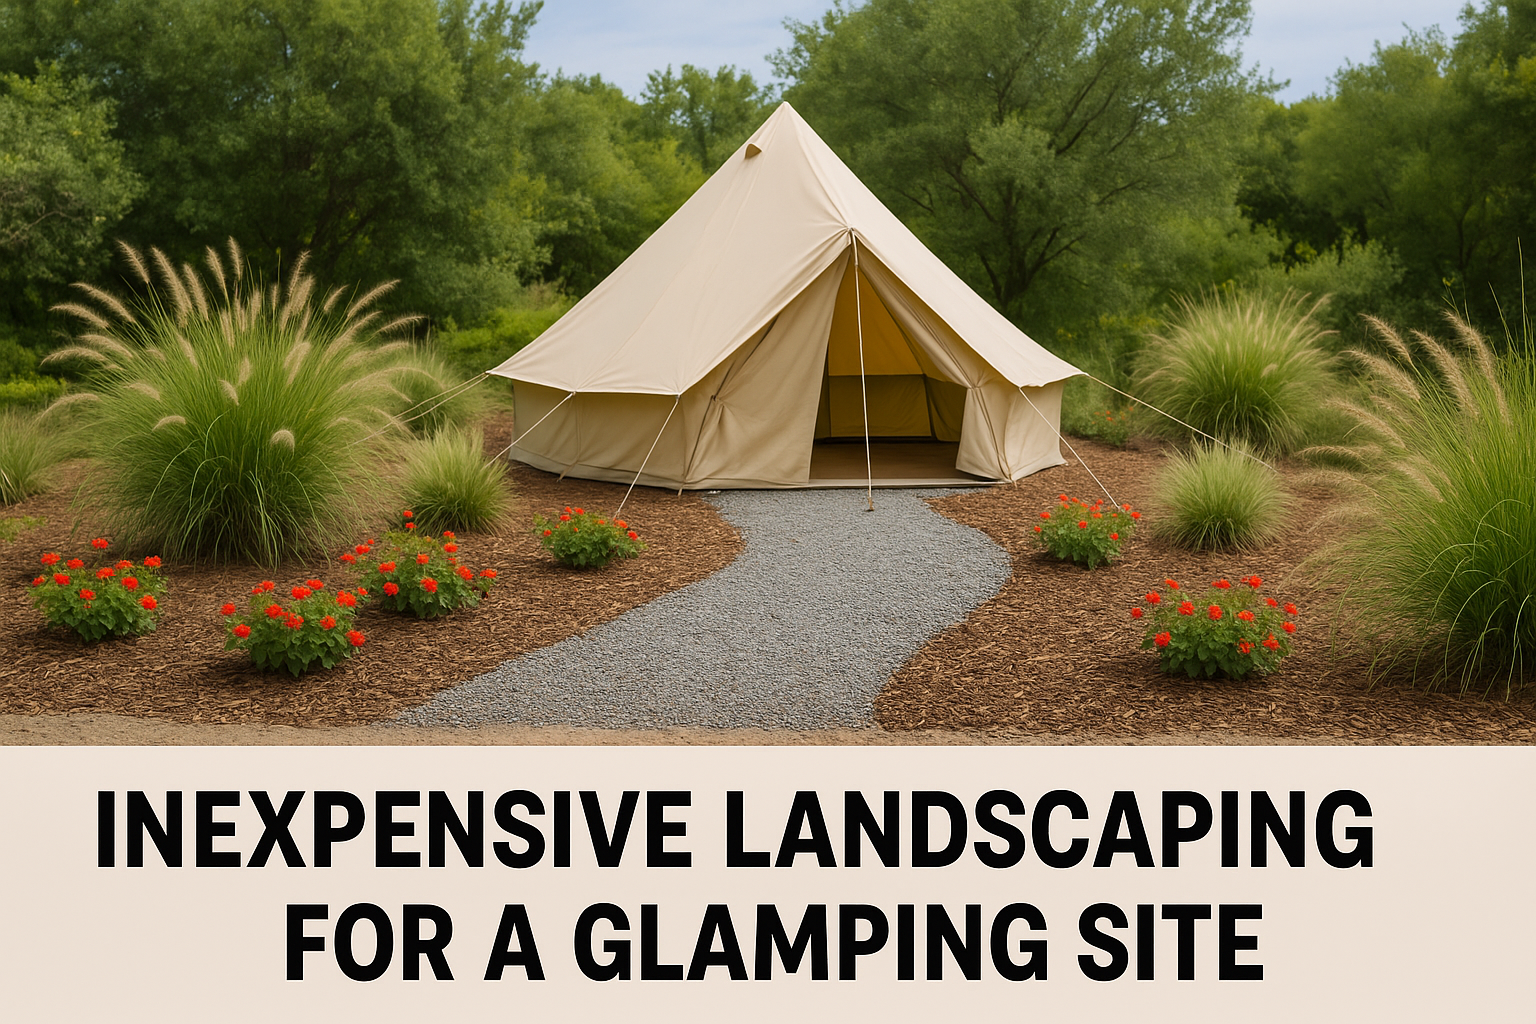
Tiny homes are taking the glamping world by storm, offering travelers a cozy, eco-friendly getaway without sacrificing comfort. For property owners and aspiring entrepreneurs, setting up a tiny home vacation rental can be both affordable and rewarding. Whether you’re placing it on your own land or expanding a rural retreat, here’s a complete guide to creating a charming, functional, and low-cost glamping experience using a $3000 to $10,000 tiny home shell. Remember, landscaping is everything, and so are professional images when listing your vacation rental property.

Step 1: Buying the Right Tiny Home Shell
Home Depot, a cost-effective solution, offers a variety of pre-fabricated shed-style structures that can be converted into livable tiny homes. For around $10,000, you can purchase a 12×20 or 12×24 wood-frame building. These come with windows, a door, and solid construction, making them an excellent blank canvas. Choose one with a lofted roof if you want to add extra sleeping space or storage.
Step 2: Preparing the Land
Before placing your tiny home, you need a level foundation. Concrete blocks, pressure-treated wooden piers, or a gravel bed are low-cost options. If you plan to rent out the home frequently, consider installing a simple gravel path or patio with solar path lights to enhance guest safety and the outdoor ambiance.
In most rural areas, no building permit is needed for structures under 200 sq ft used for recreational purposes, but always check with your local county office just to be sure. Zoning laws vary, and some regions require permits for electrical hook-ups or composting toilets.
Step 3: Off-Grid Solar Power System
Solar is one of the smartest investments for a tiny home vacation rental. Start with a basic 200 to 400-watt solar setup, which can power LED lights, charge phones and laptops, and run a small water pump. Here’s a breakdown of what you’ll need:
- 2–4 Solar Panels (100 watts each)
- Charge Controller
- 12V Deep Cycle Battery or Lithium Battery
- Power Inverter (1000W is sufficient for light usage)
- LED lighting fixtures or string lights for ambiance
This setup costs around $600–$1,000 and is often available as a complete kit. Mount the panels on the roof or nearby on a ground frame for easier access.
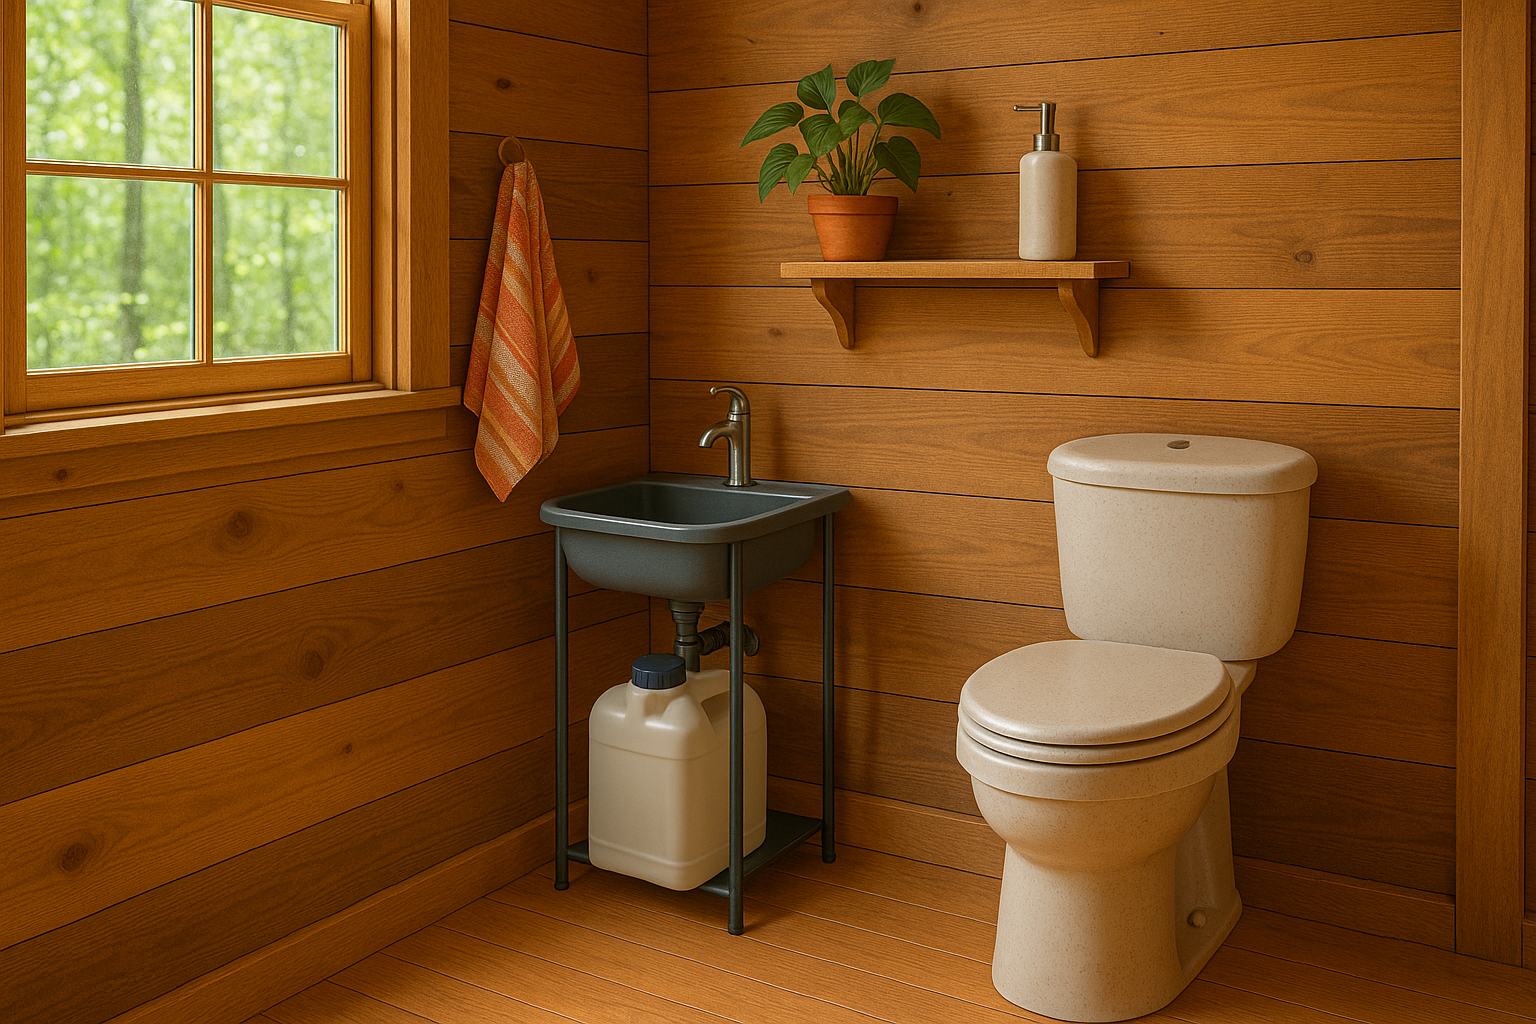
Step 4: Installing a Composting Toilet
A composting toilet is perfect for tiny homes because it requires no water or plumbing. Models like Nature’s Head or Separett are odorless, safe, and easy to use. Prices range from $900 to $1,200, but you can also DIY a simpler version using a 5-gallon bucket, sawdust, and a vent fan for less than $100.
Add a small closet-sized enclosure with a vent fan to keep things fresh. This upgrade makes your tiny home compliant with eco-lodge standards and is a big selling point for environmentally conscious travelers.
Step 5: Building a Doable Tiny Kitchen
You don’t need a full kitchen to impress glamping guests—just something functional and adorable. A low-cost kitchen setup includes:
- Compact countertop (reclaimed wood or butcher block)
- Single-basin sink with hand pump faucet or 12V electric pump
- 5-gallon water jugs (one for fresh water, one for greywater)
- Portable propane stove or electric hot plate
- Mini-fridge or cooler box
- Open shelving for dishes, mugs, and pantry items
All of this can be put together for under $800 if you’re thrifty with materials. Bonus points if you include a French press or small pour-over coffee station to elevate the guest experience.
Step 6: Insulating and Interior Finishing
To make your tiny home cozy in all seasons, insulation is essential. Use foam board, spray foam, or recycled denim insulation in the walls and ceiling. Then, cover the interior with shiplap or plywood painted white for a clean, bright look. Add rugs, curtains, and cozy textiles to soften the space.
An electric blanket or small propane heater makes off-season glamping possible, increasing your rental income year-round.
Step 7: Furnishing with Style and Purpose
This is where charm meets function. Include:
- A queen or full-size bed with under-bed storage
- A fold-out table for dining or laptop use
- A comfortable reading chair
- Hooks, baskets, and wall shelves for organization
Shop secondhand stores and thrift shops for décor items that feel curated and intentional. Neutral tones with pops of color work well for Instagram-worthy appeal.
Step 8: Creating the Outdoor Experience
Since glamping is about connecting with nature, make the outdoor space just as inviting. Include:
- A fire pit with seating
- A picnic table or small bistro set
- A hammock or outdoor swing
- Solar-powered string lights around the perimeter
You can also add a simple outdoor shower with a gravity-fed bag or a propane water heater and privacy enclosure for a luxurious touch.
Step 9: Listing on Airbnb or GlampingHub
Once your tiny home is ready, take bright, professional-looking photos that highlight both the interior and outdoor space. Emphasize its off-grid charm, eco-friendliness, and peaceful setting in your listing. Mention solar lighting, composting toilet, and rustic kitchen as unique features. Set competitive nightly prices based on your local market—anywhere from $60 to $150 per night is common.
Be sure to:
- Offer flexible check-in with a lockbox
- Include welcome touches like a guest book, snacks, or a handwritten note
- Ask for reviews after each stay to quickly build up your credibility
Final Thoughts
For around $15,000–$18,000 total—including solar setup, composting toilet, basic kitchen, and furnishings—you can create a glamping tiny home that is not only eco-friendly and low-maintenance, but also highly profitable. With the growing demand for unique and sustainable travel experiences, now is the perfect time to invest in a tiny home glamping rental.
It’s satisfying, manageable, and you just might find yourself booking weekends out months in advance. Let your creativity flow, keep it cozy, and give your guests a one-of-a-kind stay they’ll never forget.
If you’d like to learn more about the various categories of glamping, read our article on “What is Glamping?”